Fill in the blank document with Google Docs No table required

Fill in the blank – no tables required
I a previous lesson I showed how to create a fill in the blank sentences document. I used a table to format the paragraph. This is a great method, but it does take time to create. I have a faster method for you. The first step is to create sentences or paragraphs. Use the link below to get a copy if you want to follow along.
Use the links belwo to get a copy or preview of the final product.
Get a copy: https://bit.ly/2MJUalj
Get a preview: https://bit.ly/3dSAQhE

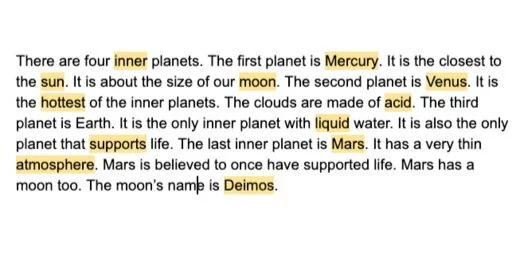
sample paragraph
Highlight the words you want to assess. Select a word and use the background color selector. Choose a light color so the text is still easy to read.

choose a light color to highlight words
The paragraph looks something like the image below.
highlight words to be assessed
Highlight the paragraph and make a copy.

select the paragraph and make a copy
Insert a few carriage returns between the paragraphs. Paste the copy below.

paste below the previous paragraph
Erase the first word.

erase one of the words
Click Insert and select Equation.

insert an equation
Type a backslash followed by the word underline.
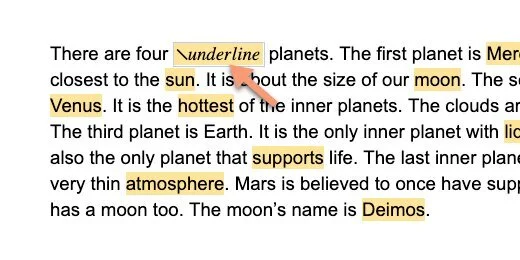
backslash and underline
Press the spacebar five times. This creates the underline. The underline doesn't have to be very wide. The underline command does not show as part of the paragraph.

fillable space created
Repeat the process with the next word. The missing words in my example are highlighted. I like this option. It helps students identify where words need to be inserted.
To keep the highlight, follow this step. Highlight the word and don't erase it. Insert the equation command while the word is selected.

spaces with and without highlighting
Students type the words on the underline. The space increases to accommodate the word.

words placed in the paragraph
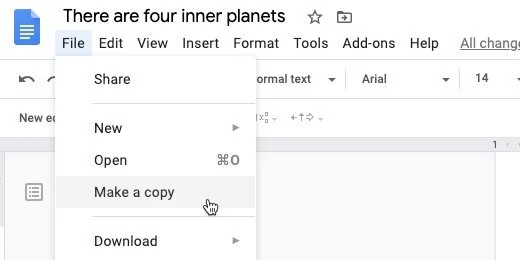
Make a copy of the document.
make a copy
Make sure to update the name.

rename the copy
Add a heading and make it look nice. Distribute to students using Google Classroom.

format the student copy
Teacher Master Document
You are eventually going to use this document with students. Use the document for a whole group activity. Use it to check the assignment answers with the class. Use it for teaching and review. Erasing the answers is easy but tedious. This is what I do with my documents when using them with students. Return to the tab with the original version. Click File and go to version history. Select the option to name the current version.

name a version for the master
Name the version Original and click Save.

name the master original
Go ahead and fill out part of the document.

fill in some of the words
Click File and go to version history. Select See version history.

see version history
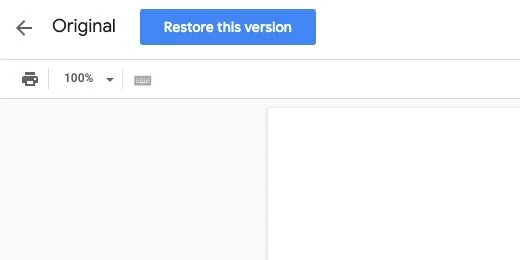
Selection the Version marked as Original.

select the original version
Click Restore this version. The document with the empty blanks is restored.
restore the original version
Answer key version
It’s nice to have a version for the answer key. Fill in the blanks with the answers. Create a version and name it Answer Key. Go back to version history and retrieve the original version. Retrieve the answer key by selecting it from version history.
Bonus
Enable the option to show only named versions.

show only named versions